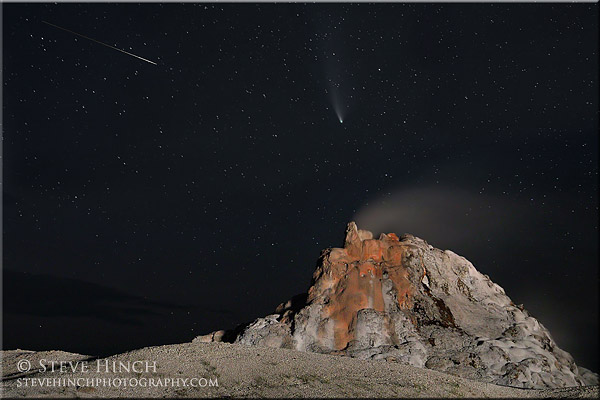
White Dome Geyser. Canon 5d4, 50mm, tripod, 20 seconds @ f4, ISO 6400
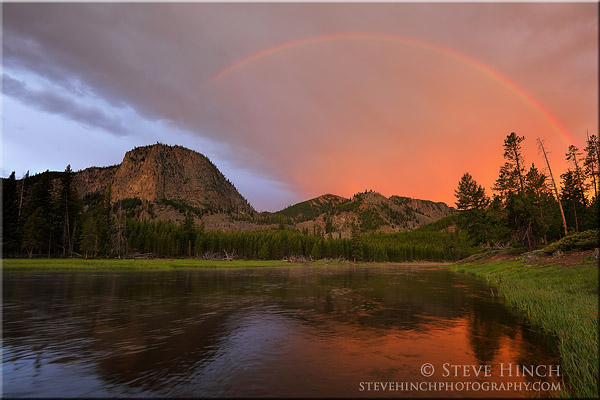
Here’s one more comet photo, this time with White Dome geyser. I was surprised at the number of shooting stars that took place on this particular evening. Some big, some small, some seen, some not. To the left of the comet, a shooting star lit up the sky during this 20 second exposure. Lights from a passing car is the reason White Dome, which sits next to the one way road, is lit up. I wasn’t thrilled with most of my shots from this night but this one certainly made up for it. It is a single, 20 second exposure.
I haven’t had a lot of luck with short-eared owls this summer despite spending a lot of time in areas where I saw plenty last year. But last week I had one put on a nice aerial display as it checked me out while I was parked along a dirt road. It circled around a few times, making a nice turn with the mountain background and eventually landed a few hundred yards down the road where it believe it was hunting for prey.
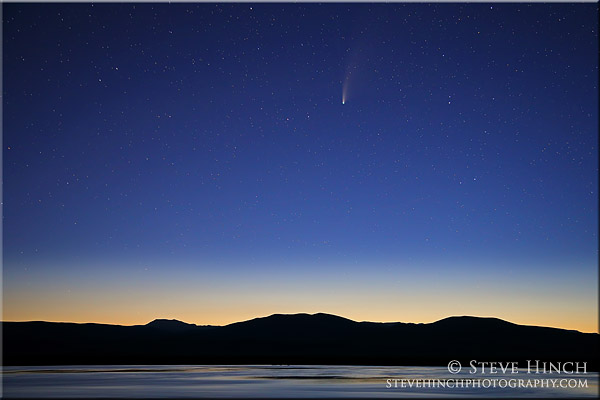
While photographing the comet, I noticed the milky way above in the sky. I turned around to see where it would be lower to the horizon and noticed this scene. It was too good to pass up, so I switched my focus and shot a couple of different compositions. Camera settings were the same for comet photos, so didn’t need to change anything. To the left of the milky way, the two brightest objects are Jupiter and Saturn, with Jupiter being the brightest and closest to the milky way.
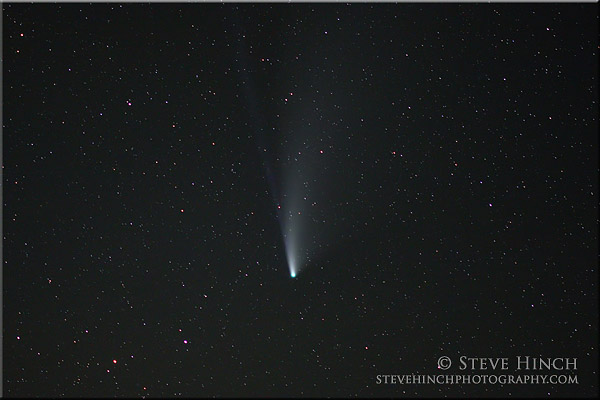
Comet Neowise at about 10:30 pm. 5d4, 50mm, tripod, 20 seconds @ f4, ISO 3200
Like many other photographers, I’ve been trying to photograph the comet Neowise while it’s visible in our night skies. I’ve done some night photography before and it’s not an easy task requiring a lot of practice. The comet can be seen directly below the big dipper starting around 10:30pm, about 90 minutes after sunset, in the north west sky. This image was photographed right around 10:30pm and I was surprised at how much warm color was picked up by the camera sensor that late after sunrise. This is a single image and the only post processing, or photoshop work, done to it was noise reduction. The two biggest challenges in night photography, at least for me, are 1.) getting the focus correct and 2.) getting enough light to the camera sensor.
Neowise at 11:55 pm. Canon 5d4, 100mm, tripod, 10 seconds @ f2.8, ISO 6400 (final image cropped)
For focusing, I have a couple of different strategies. I’ll often set up at sunset, for a night shoot, and identify what I want to shoot and pre-set the focus on my lenses. I leave them in manual mode and hope I don’t accidently adjust the setting. I’ll do this with a couple of different lenses for different focal lengths. Again, if you do this, you can use a smart phone of take a photo of the settings so you can match them back later. A light source such as a camping headlamp is essential so you can check the settings on the lens and such. Another strategy, if I’m working where there isn’t anyone around, is to use a strong light on a nearby object and then focus on it. I can then turn off autofocus and the light and shoot. And of course, the third strategy is to focus bracket. I’ll manual focus, shoot, check the results on the back of the camera, and then adjust until I have the image sharp. Depending on the situation I may use one or all of the above.
The second challenge involves getting enough light to the sensor. Fast lenses are a must. Two of the lenses I use have a maximum aperture of f2.8 while I also use one that is f4.0. I feel the f2.8 is essential as it obviously lets more light reach the sensor, but I also have to work with what I have. ISO is the next factor and early on I might start at around 1600 but by midnight I will use an ISO of 6400. I prefer a camera with a full frame sensor because they tend to handle noise a lot better than a camera with a crop sensor. And a tripod and cable release are also essential because I’ll be working with shutter speeds anywhere from ten seconds up to thirty seconds. In the second image above, I mention using a 100mm lens to photograph the comet close up. The best I could get was ten seconds for the exposure but I do have some blur in the stars with this focal length and shutter speed combination due to the starts moving. With wide angle lenses, blur in the stars doesn’t happen as much until around an exposure of 20 seconds. So to get enough light to the camera sensor I 1.) use a fast lens, preferably with a maximum aperture of f2.8, 2.) use as high an ISO as I need depending on how dark it is, 3.) use a full frame camera to better handle the noise from the high ISO’s, and 4.) use a shutter speed that matches up best for the results I want based on the first three points. I’ll follow up with a few more night images later so for now, thanks for reading!
A while back I started adding camera settings to each of my photos so that you, the viewer, might have an idea of what settings go into different photos. I didn’t add the actual camera type but also have added that as I use two different cameras, one with a full frame sensor and one with a crop sensor. This is important to note since it affects the effective focal length of the lens. So if I shoot at 500 mm with a full frame camera such as the Canon 5D Mark IV (5d4), then the effective focal length is 500mm. But if I use a Canon 7D Mark II (7d2) which as a crop sensor, the the effective focal length is 800mm (500mm lens times 1.6 crop factor = 800mm). With that all said, here is some other information about the settings you might see, and not see, included with the images I post. Keep in mind, camera settings used are all part of the creative process of photography. These aren’t rules but are simply settings I use to get the results I desire.
Shooting in RAW mode allows me to decide how the highlights and shadows look, not the camera.
Shooting Mode. Digital cameras today can shoot in RAW or JPG modes, or both. JPG mode applies various settings to the photo and processes the RAW file into a JPG. RAW files are unprocessed photos. I don’t include this information in my shooting details because I always shoot in RAW mode. As a photographer, I don’t believe a microchip in a camera has the ability to make the decisions to create the photograph as the scene is presented before me, so I want total control over the final image.
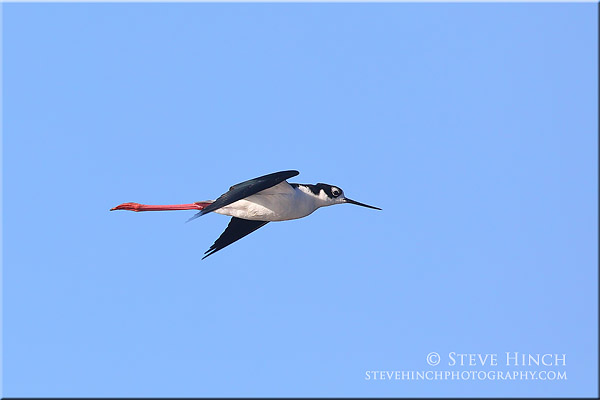
Black-Necked Stilt. Auto white balance adjusts as the bird flies through different light conditions.
White balance. I started my photography journey in the age of film. With film, what is now called white balance in digital cameras was controlled by the use of filters. Today, white balance can be set either in camera or adjusted at home on the computer if the photographer shoots in RAW mode. I leave this setting on auto and then make adjustments to the RAW file on the computer in order to get the best white balance for the scene. This saves time in the field, especially when shooting in rapidly changing light.
For this scene, I used evaluative metering to get a more even exposure but still overexposed knowing the camera would try to underexpose the fog.
Metering. The third setting I don’t post on my photos is the metering mode. I don’t post it because I have one rule that I tend to follow in most situations. When photographing wildlife, first and foremost I want the animal to be correctly exposed and the background is secondary. So for wildlife, whether it’s birds or mammals or anything else, I will meter off my subject and either adjust to overexpose (for white or bright subjects) or underexpose (for dark subjects) accordingly. One the flipside, for landscapes I almost always use evaluative metering, which bases the exposure on the whole scene. I will still adjust the exposure to under or over depending on what I am seeing but using this setting allows me to have a more even exposure across the whole photo. That’s it for now, I’ll do a follow up post down the road.
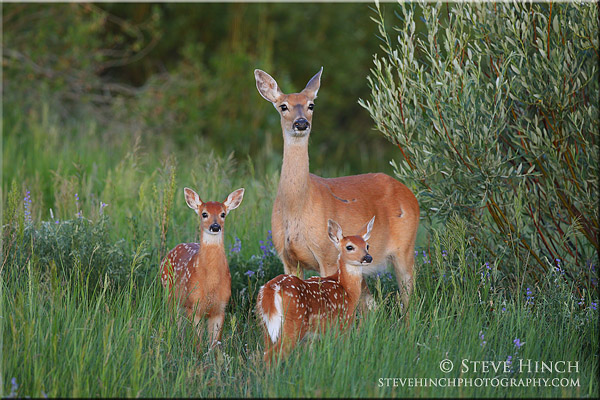
My objective through June and into July has been to try to find and photograph moose calves. But a secondary goal is to photograph pretty much any baby animals. I’ve once again failed miserably at finding moose calves but I’ve had a lot of fun photographing other youngsters. I’ve been pretty lucky with whitetail fawns. This image was taken a few days ago and the deer family was motionless as they could hear several coyotes yipping a long distance away. Eventually, they moved into the willows and out of sight.
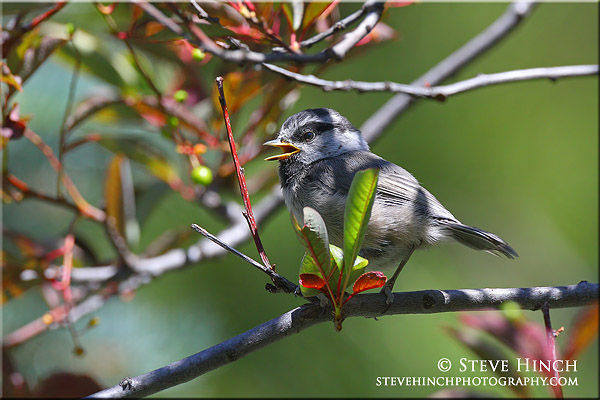
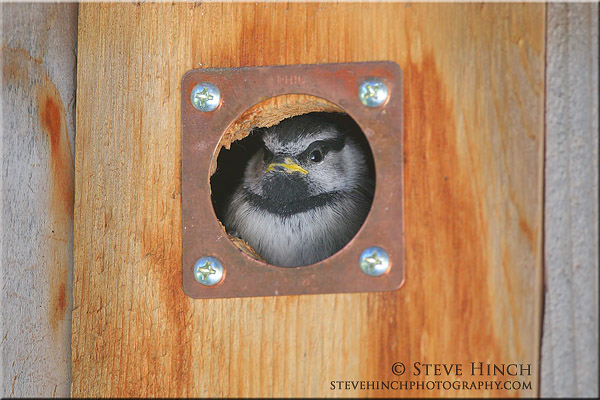
On our property, we set up a couple of nesting boxes several years ago. Mountain chickadees have used them every year. This year, only one of the boxes was used. The young chickadees fledged, or left the nest, this past Tuesday and I happened to be home when it happened. I had no idea how many young were in the box until they fledged when I found out it was three. That just happens to be the same number we’ve had each year. This was the third and final fledgling and this photo was taken only minutes after it left the nest. There’s a bonus photo on my blog showing the fledgling still in the nest box looking out.
Still in the nestbox. Canon 5d4, 500mm, tripod, 1/200 @ f5.6, ISO 1500
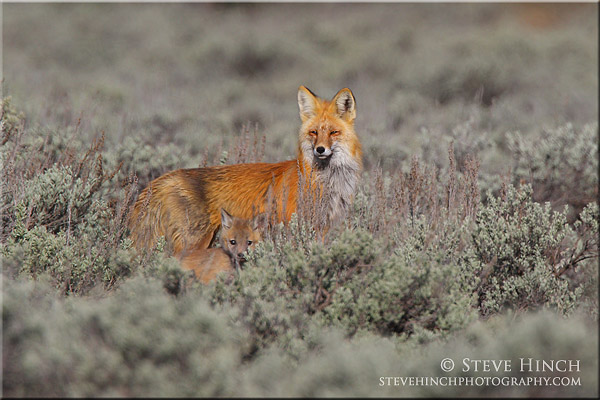
Fox and kit. Canon 7D2, 500mm +1.4 TC, 1/2000 @ f8, ISO 320
I shared a photo from a badger den I was fortunate enough to see and photograph, I also photographed at a couple of fox dens. Neither den was ideal and neither produced a lot of images. The image here shows the mother with one of her kits. The den was well hidden in the sagebrush and I never did see exactly how many kits she had due to them not being visible in the brush. This is one of the few usable images I was able to produce.
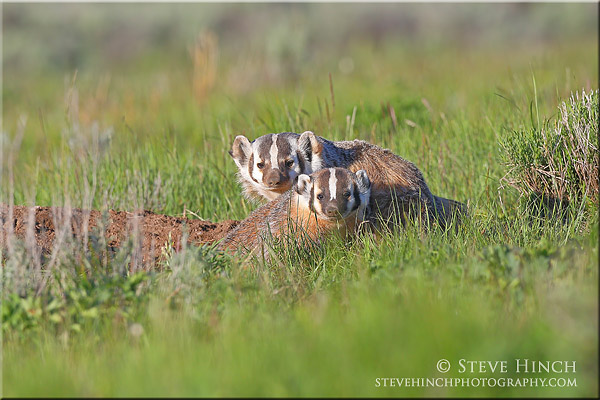
Badgers. Canon 5d4, 500mm, tripod, 1/1600 @ f8, ISO 800
Denning season is largely over as youngsters have grown up and moving off on their own. From May into June, I was very fortunate to photograph at a couple of different dens, including this badger den. This is the second year in a row that I’ve seen badgers using this den site. I never saw more than one youngster here this year, so I’m assuming there was only one though it is possible they just never came out at the same time.
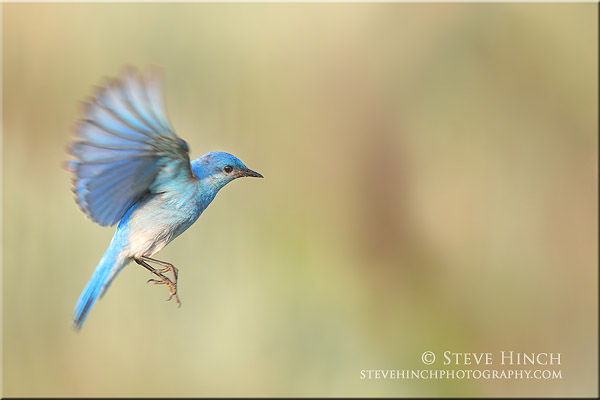
A few days ago, as I was out photographing, I noticed a pair of mountain bluebirds that were very active outside their nest box. They took turns catching insects and bringing them back to their young and often hovered in the air near the nest box as they waited for the other to come out. Most of my shots didn’t come out well but I did get a handful that I liked, including this one.