
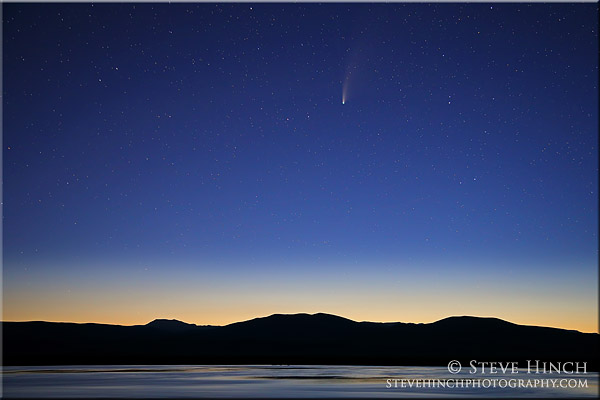
Like many other photographers, I’ve been trying to photograph the comet Neowise while it’s visible in our night skies. I’ve done some night photography before and it’s not an easy task requiring a lot of practice. The comet can be seen directly below the big dipper starting around 10:30pm, about 90 minutes after sunset, in the north west sky. This image was photographed right around 10:30pm and I was surprised at how much warm color was picked up by the camera sensor that late after sunrise. This is a single image and the only post processing, or photoshop work, done to it was noise reduction. The two biggest challenges in night photography, at least for me, are 1.) getting the focus correct and 2.) getting enough light to the camera sensor.
For focusing, I have a couple of different strategies. I’ll often set up at sunset, for a night shoot, and identify what I want to shoot and pre-set the focus on my lenses. I leave them in manual mode and hope I don’t accidently adjust the setting. I’ll do this with a couple of different lenses for different focal lengths. Again, if you do this, you can use a smart phone of take a photo of the settings so you can match them back later. A light source such as a camping headlamp is essential so you can check the settings on the lens and such. Another strategy, if I’m working where there isn’t anyone around, is to use a strong light on a nearby object and then focus on it. I can then turn off autofocus and the light and shoot. And of course, the third strategy is to focus bracket. I’ll manual focus, shoot, check the results on the back of the camera, and then adjust until I have the image sharp. Depending on the situation I may use one or all of the above.
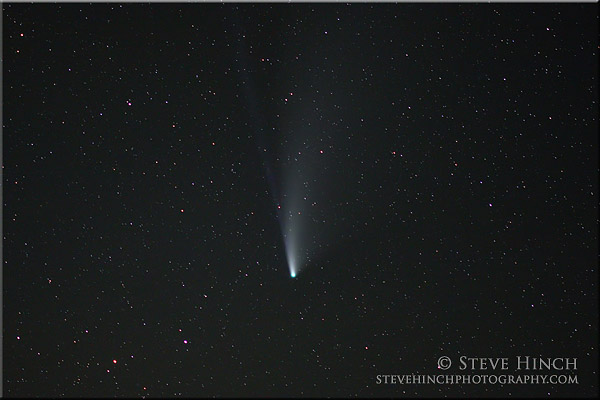
The second challenge involves getting enough light to the sensor. Fast lenses are a must. Two of the lenses I use have a maximum aperture of f2.8 while I also use one that is f4.0. I feel the f2.8 is essential as it obviously lets more light reach the sensor, but I also have to work with what I have. ISO is the next factor and early on I might start at around 1600 but by midnight I will use an ISO of 6400. I prefer a camera with a full frame sensor because they tend to handle noise a lot better than a camera with a crop sensor. And a tripod and cable release are also essential because I’ll be working with shutter speeds anywhere from ten seconds up to thirty seconds. In the second image above, I mention using a 100mm lens to photograph the comet close up. The best I could get was ten seconds for the exposure but I do have some blur in the stars with this focal length and shutter speed combination due to the starts moving. With wide angle lenses, blur in the stars doesn’t happen as much until around an exposure of 20 seconds. So to get enough light to the camera sensor I 1.) use a fast lens, preferably with a maximum aperture of f2.8, 2.) use as high an ISO as I need depending on how dark it is, 3.) use a full frame camera to better handle the noise from the high ISO’s, and 4.) use a shutter speed that matches up best for the results I want based on the first three points. I’ll follow up with a few more night images later so for now, thanks for reading!
